


 support@brosisco.store
Table of Contents
- Step 1: Pick a Container Built for the Long Haul
- Step 2: What to Put in a Memory Box for Family
- Best Materials for Long-Term Storage
- Step 3: Personalize the Exterior and Add Personalized Family Keepsakes
- Step 4: Organize, Catalog, and Document Every Item
- Step 5: Store Your Memory Box to Last for Decades
- Common Mistakes to Avoid When Building a Memory Box
- Conclusion: Start Your Family Legacy Today
- Frequently Asked Questions
Last Updated: September 15, 2026
Step 1: Pick a Container Built for the Long Haul
Learning how to create a memory box for family starts with the container. The wrong box can quietly damage everything inside within a few years. This guide walks through the full process, from choosing an archival box to cataloging every item.
A memory box is a dedicated, archival-quality container used to store sentimental objects, photographs, and documents so they survive for decades without yellowing, cracking, or fading. The container matters more than the decoration.
Here is what to look for before you buy anything:
- Acid-free and lignin-free materials. Ordinary cardboard and some plastics release acids over time that stain photos and brittle paper.
- A tight-fitting lid. Dust, insects, and humidity cause more damage than most people realize.
- Rigid walls. Flimsy boxes crush under stacked weight and let light in through gaps.
- A size that matches your collection. Too large and items shift around; too small and you will need a second box within a year.
Avoid shoe boxes, decorative gift boxes, and anything made from recycled paperboard. They look fine on a shelf and fail the long-term test. If you are unsure whether a material is safe, check guidance from the National Archives on storing family papers and photographs, which recommends archival-grade enclosures for anything you want to keep for generations.
Step 2: What to Put in a Memory Box for Family
The best memory boxes mix paper, fabric, and small objects so the collection tells a story. Start with the items carrying the strongest emotional weight, then fill gaps.
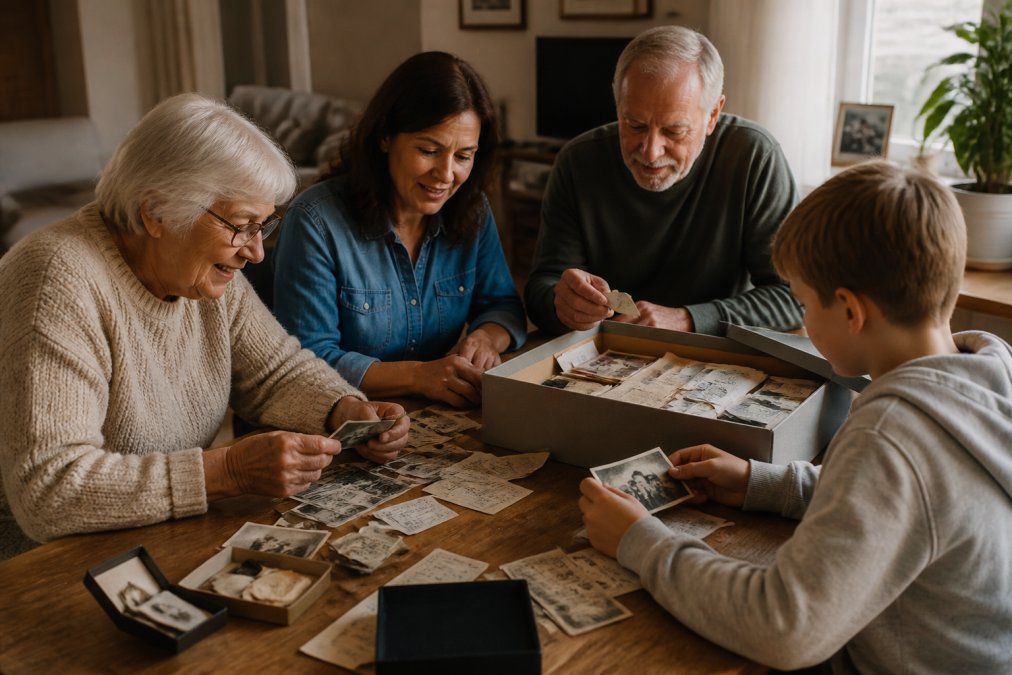
Common items families include:
- Photographs, both printed and labeled
- Letters, cards, and handwritten notes
- A baby's first outfit or a lock of hair in a small envelope
- Ticket stubs, programs, and travel mementos
- Military documents, awards, and certificates
- A small piece of jewelry or a watch that belonged to a relative
- A written memory or short story about the person or event
If you are building a box for a parent or grandparent, a journal makes a thoughtful companion piece. BroSisCo's People, Places, Memories - Journal is a vegan leather notebook with a ribbon bookmark and elastic closure, perfect for personal reminders, goal setting, or just getting organized.

Best Materials for Long-Term Storage
Long-term storage is where most memory boxes quietly fail. The materials inside determine whether a photograph is readable in 40 years or has yellowed into a brown rectangle. The goal is to slow three chemical processes: acid migration, oxidation, and moisture cycling.
Acid migration is the big one. Paper made from wood pulp contains lignin, which breaks down and produces acids that attack the paper itself and anything touching it. That is why a newspaper clipping stored against a photo will eventually burn a ghost image into the photo's surface. The fix is to separate every item with acid-free, lignin-free, buffered stock, the same standard the National Archives recommends for storing family papers and photographs and that archival suppliers label as "archival" or "museum-grade."
Oxidation and off-gassing come from the wrong plastics. Polyvinyl chloride (PVC), still common in cheap photo albums, releases hydrochloric acid as it degrades, which is why old PVC albums smell like a swimming pool and leave photos stuck to the page. Safe plastics are polyethylene (PE), polypropylene (PP), and polyester (PET/Mylar). If a sleeve smells like a new shower curtain, it is not archival.
Moisture cycling is the slow killer. Every time humidity rises and falls, paper fibers swell and shrink, textiles mildew, and metal corrodes. Sealing everything in a plastic bag traps whatever moisture was already inside. The correct approach is a breathable enclosure (acid-free tissue, unbleached cotton) inside a rigid, tight-lidded box, stored in stable humidity.
Here is how the major material categories break down:
| Item Type | Safe Material | Avoid | Why |
|---|---|---|---|
| Photographs (prints) | Acid-free sleeves, archival folders, polyester (Mylar) sleeves for frequently handled prints | PVC pages, cardboard, rubber bands, adhesive photo corners | PVC off-gasses acid; rubber bands leave permanent indentations |
| Negatives and slides | Polyester or polyethylene sleeves, stored vertically | Paper envelopes, stacked flat | Paper can scratch emulsion; stacking causes pressure marks |
| Textiles (baby clothes, uniforms, linens) | Washed unbleached cotton, acid-free tissue, padded rolls for folds | Sealed plastic bags, wire hangers, cardboard boxes | Trapped moisture causes mildew; cardboard acids stain fabric |
| Paper documents, letters, certificates | Acid-free folders, flat storage in buffered boxes | Folded stacks, rubber bands, tape, lamination | Folds crack over time; tape yellows and stains; lamination is irreversible |
| Small objects (jewelry, watches, medals) | Polyethylene bags, padded archival boxes, cotton batting | Bare metal contact with paper or fabric, PVC | Metal salts transfer and stain; PVC off-gasses |
| Metal items (coins, dog tags, tools) | Separated in polyethylene bags with a barrier layer of acid-free tissue | Direct contact with paper, fabric, or other metals | Rust and corrosion transfer between metals and stain organics |
Practical rules that follow from the table:
- Never laminate. Lamination is permanent and irreversible; conservators routinely refuse to work on laminated documents because removing the plastic destroys the paper.
- Never use tape, glue, or rubber bands on anything you want to keep. Tape yellows, oozes, and stains within a decade. Rubber bands vulcanize and fuse to paper.
- Fold textiles as little as possible. Pad folds with crumpled acid-free tissue so the fabric does not crease along a hard line.
- Wear cotton gloves when handling photographs and metal objects. Skin oils are acidic and etch into emulsion and metal surfaces.
- Label with a soft graphite pencil, not ink. Pencil is reversible; ink is not. Write on the sleeve or folder, never directly on the photo.
For a home project, the simple rule is: if it is not sold as archival, acid-free, or lignin-free, assume it is not. The cost difference between a standard cardboard box and an archival one is usually a few dollars, the highest-return upgrade in the project.
Step 3: Personalize the Exterior and Add Personalized Family Keepsakes
A plain archival box works, but a personalized exterior turns storage into a display piece. Keep decoration on the outside; adhesives, paint, and ink on the interior can off-gas and damage contents.
Personalized family keepsakes belong inside as well. BroSisCo's My Soulmate and Best Friend - Leather Journal is a vegan leather notebook with a ribbon bookmark and elastic closure that fits neatly alongside photos and letters.

Step 4: Organize, Catalog, and Document Every Item
Cataloging is the step most families skip, and it determines whether the box is a collection or a pile.
The physical index
The digital layer
A note on digital longevity
Step 5: Store Your Memory Box to Last for Decades
Common Mistakes to Avoid When Building a Memory Box
Conclusion: Start Your Family Legacy Today
Frequently Asked Questions
What should I include in a family memory box?
Start with items that carry sentimental value: photographs, handwritten letters, a small piece of a favorite textile, ticket stubs, and a written story about each item. Include at least one personalized family keepsake, such as an engraved journal, to anchor the collection. Avoid anything that is not acid-free or that could off-gas, like newspaper clippings or rubber bands, because they can damage surrounding items over time.
What are the best materials for long-term storage of a memory box?
Use acid-free, lignin-free boxes and tissue paper, and avoid PVC plastics. Archival suppliers sell boxes made from buffered board that protect photographs and textiles from yellowing. For photographs, use polyethylene or polyester sleeves. Store the box in a cool, dry place away from direct sunlight and temperature swings. Check the box once a year for pests or moisture, and rotate any items on display to limit light exposure.
How do I make a DIY wooden keepsake box?
Choose untreated, kiln-dried wood like cedar or maple, and sand all edges smooth. Seal the interior with a water-based, acid-free finish, then line it with acid-free tissue or felt. Attach hardware with brass or stainless steel screws to avoid rust. If you plan to store photographs or textiles, add a barrier layer of archival tissue between the wood and the items. Finish the exterior with a personal touch such as a engraved nameplate or hand-painted design.
How can I preserve fragile items like old photographs and textiles in a memory box?
Place each fragile item in its own acid-free sleeve or folder before putting it in the box. Do not fold or crease photographs; store them flat. For textiles, roll rather than fold, and interleave with acid-free tissue. Keep the box out of attics, basements, and garages where humidity and temperature fluctuate. If an item is already damaged, consult a conservator before attempting repairs, since tape and glue can cause further harm.


